How To Get 'Teal and Orange' Look Using Adobe Lightroom
 |
How To Get 'Teal and Orange' Look Using Adobe Lightroom |
It has been quite often that you see this 'Orange and Teal' Color combination on the photos posted on Instagram. Since there are a few followers who wonder how to create this look. I am going to share it with you today.
Instead of me creating the detailed tutorial to create this Teal and Orange look on your photos,I am going to share Denny's Tips. I've watched his video and his tutorial video is very straightforward and easy to create this Orang and Teal look. Have a look:
[Sponsored Ads below]
Links:
Denny's Orang Teal Written Tutorial: https://dennystips.com/orange-teal/
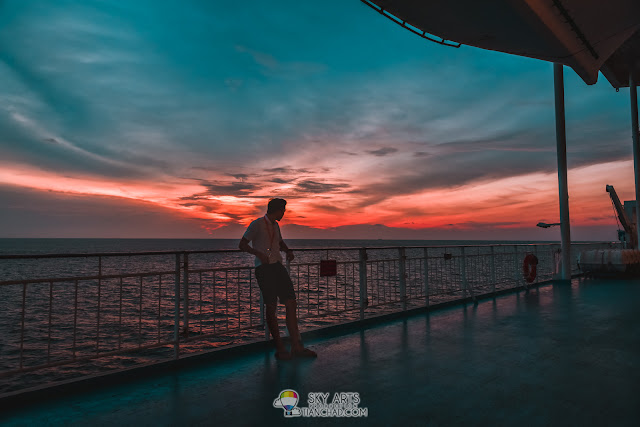
Below are more photos created with the same theory for Orang and Teal photos using Adobe Lightroom =) I will show you the before and after comparison as the 'Orang and Teal' color can definitely make your photos pop.
 |
| How To Get 'Teal and Orange' Look Using Adobe Lightroom - Before and After |
It was the evening I catch the sunset together with buddy Baki on Star Cruises Superstar Libra. Still remember the last beautiful beams of sun-ray before the sky turn dark. So yeah, below are some photos taken during that time. No tripod, just using the timer after placing the camera at one of the pole of the cruise. No proper setup, just simply do it on the spot.
Hopefully to all instagrammers and photographers out there will find this useful. Here's a tips for you, remember to adjust the Curves and Hue to personalize your 'Orang and Teal' looks. It's always better to have a unique look instead of the similar look when compared to other photos on Instagram.
Till then, see you guys on Instagram/Facebook Page for more interactions
Thanks for reading! Press the "Like" button and share with your friend kay? You can subscribe to TianChad @ 永遇乐, follow my instagram @tianchad for latest photo post, be a fans on TianChad @ 永遇乐 and follow @TianChad on Twitter for future blog post update =)


